Shapeoko Progress Update
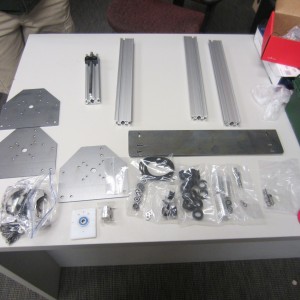
Well, my parts are all finally here and while it took a while I’m very very excited to get this mill up and running. Right now I’m rather swamped with graduate work (both school work and research) and my small family but I managed to grab a few hours Saturday night to work on the mill. Here is a shot of all the mechanical parts finally laid out. Electronics are to the right, so you can’t see them (not that they matter, riiiight?).
The evening didn’t get off to a great start. My friend Rob agreed to meet me at the Hackerspace* so that I could get in and use the taps I knew were there to tap the ends of the Makerslide aluminum extrusions. Just my luck, I needed to tap for M5 screws and the smallest tap at the space was an M6. It was somewhat ironic because Rob had an M5 back at his place, so we went there next and he has graciously let me borrow it for the duration of the project.
Given that the night started late, and with the little adventure to get the tap I wasn’t up to tapping Aluminum out in the freezing cold at 10PM. However, that doesn’t mean I didn’t make any progress! I set up shop in the living room and started putting v-wheel bearings and idlers together and attaching them to the gantry plates and different axis.
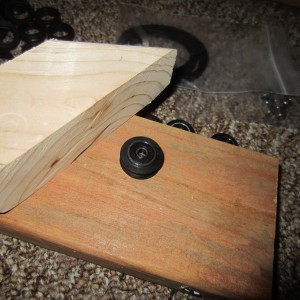
There are a lot of v-groove bearings that you have to make by pushing two small bearings into a v-groove shell. Initially I was trying to do this by hand, very bad. I eventually grabbed two pieces of pine and slowly pressed them together with the bearing – plastic – bearing combo between them. I figured that given the relative “softness” of the pine I wouldn’t end up bending or scratching the bearings or breaking the plastic. My little “jig” sped up making my v-groove bearings by a factor of at least 5, and my fingers and palm stopped hurting (a great bonus!).
My “jig”
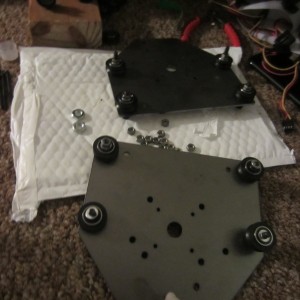
Some assembled plates, 3 total for the evening
The evening ended with all the plates assembled and moving along the Makerslide. However, since I have yet to tap what needs to be tapped I wasn’t able to assemble the full frame. I also ran into a small snag with both my motors and the z-axis coupler. It might simply be that my small allen wrench was unable to let me exert enough torque on the nuts that were supposed to “couple” my threaded rod with my motor shaft but I was unable to get a firm lock. Another issue I ran into was that my motors (sourced from Sparkfun.com Nema 17) wouldn’t mate with any of the screws of the kit. So I was unable to mount them to the steel pieces where they needed to be. I’ll have to make a quick trip to the Hardware store some time next week to rectify the small deficiencies in my kit (oh joy!). Luckily all the spacers, nuts, bearings etc all attached swimmingly. The pulleys also attached to the shafts with no problem so I’m pretty confident the frame will be assembled by the end of the week. Electronics are a different story. Here is a quick video I made of what I got done.
My electronics setup right now is going to be Arduino based. I’m using an older Arduino with GRBL on it. For stepper drivers I’m using a stepper shield and polulo drivers from http://store.makerslide.com. To avoid headache I purchased the pre-soldered shield from Barton @ Makerslide.com.
My software stack has been evolving. I’m debating using EMC to drive the electronics but there are several good scripts and other alternatives out there that I also want to try. For my CAD modeling I’m working on learning two different CAD tools (FreeCAD and Open SCAD). For Gcode generation I’m investigating HeeksCNC, CAMBAM (the older free one), and PyCAM. I have access to Autodesk Inventor through my University but I feel that if open source software isn’t used, then a community of savvy users will never exist and the software will not improve as it will not garner enough interest to draw the attention of committed developers. I hope that through my own involvement with these open source hardware and software projects that a competent and relativly user friendly digital to real fabrication pipeline will be created.
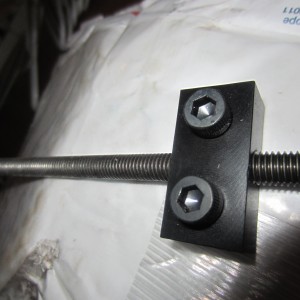
The troublesome part. Edward over at Shapeoko had these derlin nuts custom machined locally and they kept delaying and delaying getting them to him. Because of this single piece my order from him got delayed by almost a month and a half. Silly supply lines!
*Currently not a full member, decided to put dues towards my mill and 3D printer instead of space I wasn’t using as often as I had in the past. Hey, Grad student with a family here! I had to promise no Father’s day presents, Graduation presents or my NEXT birthday’s presents to get these bots ordered. I’ve even forgone my tri-year computer upgrade (running an old 2.7 dual core AMD DDR2 system) to free up the cash to get these babies up and running!


