Cheap and Easy Tony Stark Arc Reactor
I really enjoy Halloween and use it as an excuse to spend more time working on fun projects. This year as a family we decided to all be superheros as the nicknames for our boys on our blogs has always super hero based. This year were going to be Superman, Batman, Wonder Woman, and Tony Stark (Iron Man). You can guess who I decided to be. We had a fun group trunk or treat (gather a bunch of people and share dinner and then let the young kids trick or treat through the parked cars) tonight so I needed to throw something together quickly. On my way home from work I hit the dollar store to see what I could find. I’d been inspired by James from xRobots.co.uk post about building an arc reactor from 99pence store parts (he’s British) so I went to the American equivalent (Dollar Tree) to see what could work.
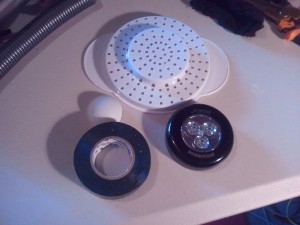
While at the store I picked up some basic pieces for my Arc Reactor and spent about 4 dollars to get everything. Here is my shopping list.
1. LED push light (cheap 3 LED light)*
2. Dish drain cover
3. Electrical Tape
I ended up using a glue gun and duct tape as well so if you had to buy everything to do this it would still be under 10$ (1$ cheap duct tape from Dollar Tree and 5$ for a glue gun). Ignore the ping pong ball in the picture, I initially decided to use a chopped in half ping pong ball as a diffuser but ended up not using it for the arc reactor. The assembly was quite simple.
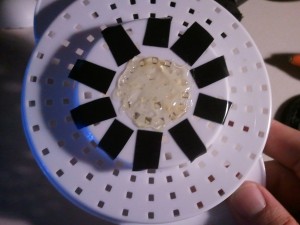
1. Cover the central part of the dish drain cover with lots of hot glue. When the glue hardens it will diffuse the bright LEDs so that the glow from the “reactor” will light up the cavity and your chest.
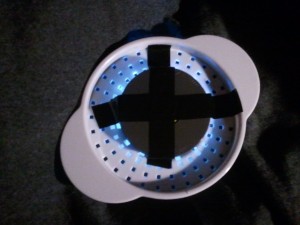
2. Cut out 10 roughly equal 1/4 inch wide pieces of electrical tape and arrange them around the edges of the dish drain cover.
3. To diffuse the light even more I added a piece of paper on top
4. Turn on the LED and admire your work.
5. The next step is to secure in the LED push button light with tape. If you’re lucky the light will be able to be clicked on and off now that it is securely in place.

6. Do a quick fabric test to see how much light bleeds through your shirt. Unfortunately, I bought a dark grey shirt to wear when a light grey would probably have been better.
7. I wore a light undershirt underneath my long sleeved grey shirt (it is cold outside these days!). The undershirt allowed me to duct tape the dish drain cover and the complete assembly in the right place and let my grey shirt move naturally.
The effect turned out really nice but only worked well after dusk and in lower lighting. Ignore my less than stellar attempt to dye my hair black and color in my very very short Tony Stark styled Goatee (ironically I had just barely shaved back my beard earlier this week before I’d decided to go as Stark).
Here is a shot at dusk (same room, light turned off and the window blinds open). All in all it took less than 30 minutes to assemble and with a little makeup and the right shirt it turned out pretty good. For Halloween evening I’m working on a more complicated version that includes a rough Iron Man Gauntlet with light and sound but to build that you’ll need a 3D printer which most people don’t have right now. More on that later.


